Shooting a new product . . .
Thursday, July 8th, 2010
Shooting a new product is something commercial product photographers face all the time. Sometimes the client has ideas about how it’s supposed to look, sometimes not. At times, it is easier to give the client the look he or she wants, if they spell it out, as opposed to “You’re the photographer. You come up with a great image. You’re the pro. That’s what you’re being paid for.” Or something to that effect.
The following product shoot fits the latter scenario more than the first:
I had three bottles of an inexpensive nail polish to shoot. The bottles contained glitter. I wanted to show the bottles to be more powerful than they are. After all, from my perspective, if one is seeing the nail polish in an ad, it should appear to be, well, more than nail polish. The bottles themselves were less than perfect. In a big money promo shoot, a photo stylist will sift through many bottles to find the perfect ones. Sometimes the manufacturer supplies the products, and sometimes the stylist has to go to several retail outlets to get the most perfect props for the image. In the case of the nail polish, it was three colors of glitter nail polish – a red, an orange, and a green. In this case, it was a low-budget shoot, meaning no stylist. Also, I found only one local outlet for the product, and they had a limited supply. So, I picked out the “best” bottles.
Next, I had to prepare them for the shoot. Cleaning dust and fingerprints off needs to be done. It is harder to remove these blemishes with editing software than cleaning the bottles physically. I used an anti-static cloth, and a can of Blow-Off to remove the aforesaid marks and dust.
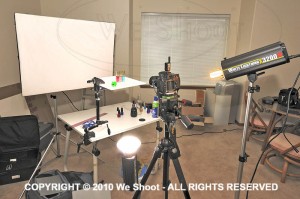
I placed them on a translucent white square mounted over a studio strobe. This lights them from underneath and eliminates shadows. It also provides white light behind the clear parts of the glass. See setup image below, example 1.
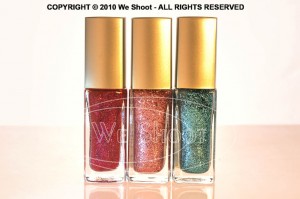
After adjusting three studio strobes and the camera for the exposures I wanted, I then captured the image you see in example 2. As you can see, the color is way off due to the lighting changes, so color correction was in order.
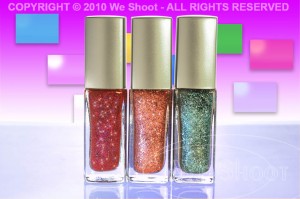
With numerous changes made in Photoshop, including adding more glitter than I could get from lighting alone, I created the image in example 3. Glitter comes from adding a small light source to shine on the glitter. I used a bare bulb on one strobe and shut off the strobe part so the modeling light would act as a small light source (hence the yellowness in example 2). I increased the time exposure to allow that bulb to put enough light on the subject to appear bright against the instantaneous strobe light. I also used a “mine flashlight” (the green object to the left front of the nail polish bottles in example 1) to shine on the bottles. I additionally added small specs of glitter to the bottles with a “bling brush” in Photoshop in several colors. I had to add the colors and rectangles and shadowing to the background.
What if I told you that given the “You’re the photographer . . .” speech above that once the image was shot, there were several tries with internet communication about colors and backgrounds before the client was happy. Like I said, it is sometimes easier to make the client happy when they have a clear image of what they want, and they convey that idea to the photographer. Otherwise, it is a real challenge to guess what the client will like, and it may take several tries.
In the end, it is nice to see the finished product. But very few know how much work and dedication go into that finished product. Now you have an idea.
-Gary Silverstein


