Weshoot.com

The Official We Shoot Blog

  • Home
  • About
  • To Comment

Archive for the ‘How To’ Category

We Shoot Photography Of The Day For 9/11/2024

Wednesday, September 11th, 2024

Click on image to enlarge.  Click again to enlarge to full size. 

Click on back button to return to post.

Click the “Home” tab above to see earlier posts.

Use of a Clipping Path in Editing Programs
 

Black phone with clipping path

Sometimes you may want to take an item from one image and place it in another image, or change the background. A clipping path makes that relatively easy.  The original high-resolution image for the photo above had a pure white background with a soft shadow.  It can be seen here on Alamy.  We have provided a clipping path with this image for the user to be easily able to use the object in a different image (without the shadow), or with a different background, using an image-editing app like Adobe Photoshop!  The object can also be reduced in size, or slightly rotated to fit a project.
Tags: background, backgrounds, black, clipping path, color, colors, image, iPhone, phone
Posted in How To, Information, Lighting, Photographs, Images, Tips | Comments Off on We Shoot Photography Of The Day For 9/11/2024

We Shoot Photography Of The Day For 2/1/2021

Monday, February 1st, 2021

Using a green screen for inserting a still photo or video into another still photo or video is a modern technique that has many uses.  Here we have a still image of a laptop computer where the original screen was replaced with a bright green color.  Using photo or video editing software and layering, the green screen can be easily cleared to show all or some part of the layer beneath it.

Click on each image to see the examples on Pond5, and click the “back” arrow to come back to this page.

Check out this 24 megapixel image available from us on Pond5:

Laptop Computer with Green Screen

Still Photo of a Laptop Computer with Green Screen


We also have a zoomed version in HD video on Pond5:

Laptop Computer with Green Screen

Laptop Computer with Green Screen Zoom Video – Give it a second or two . . .

Here’s an example of how to use the green screen, on Pond5:

Zoom Of Wild Duck Video On Computer Screen

Tags: chromakey, duck, green screen, laptop, reflection, video
Posted in How To, Information, Photographs, Images, video | Comments Off on We Shoot Photography Of The Day For 2/1/2021

We Shoot Photography Of The Day For 1/7/2019

Monday, January 7th, 2019

Click on image to check out our YouTube video 

Click on back button to return to post.

Click the “Home” tab above to see earlier posts.

Seattle Product Photography by We Shoot


Seattle Product Photography by We Shoot

Here’s a quick YouTube video tip on how to photograph shiny flat objects to minimize glare. Seattle Product Photography by We Shoot.

Tags: advertising, glare, Marketing, photography, product, quick, reflective, shiny, tip, video, weshoot.com
Posted in How To, Lighting, Tips, video | Comments Off on We Shoot Photography Of The Day For 1/7/2019

It’s All About The Angle – 9/20/18

Thursday, September 20th, 2018

If you want to shoot the perfect image of your business product, let’s talk today of one very important factor in accomplishing that goal.  The angle of view.

Early in my photography career my fabulous architectural photography mentor said to never just shoot the first thing I see.  He’d say, “With architectural photography the angle you shoot from is crucial.”  To illustrate that principle, before capturing his first image during an assignment, my mentor would walk around eyeing the scene from different angles to find the perfect shot.  Finding it, he’d set the tripoded camera down and study the view he had chosen.  He’d inch a little to the left, a wee bit to the right, and there it was.  The spot.  The one that “spoke” to him.  And then he’d start creating that perfect shot.

This principle applies to all product photography.  From cars to crayons.  From fashion to furniture.  From an industrial facility to a hospital nursing station.  Whatever product you’re selling, whatever design you’re illustrating, whatever landscape catches your eye, stop, look, and move.  Move to your right, step to your left, inch a bit forward, scooch further back.  (Or, if your subject matter is a small product, it’s the product itself you will be moving incrementally.)  Experiencing the subject in more ways than one will help you find the spot that just “speaks” to you.

I want to stress here, unless what you’re shooting will be gone in the blink of an eye, don’t go with the first “Oh, that’s so pretty” impression and shoot.  Take your time – move around – and more often than not you’ll see an improved image.  The right one.

If my assignment is shooting the interior space of a manufacturing plant, the first thing you’ll see me doing is walking with my hands surrounding my eyes like blinders on a race horse, looking for just the right perspective, the right feeling, the right angle, each time in memory of my mentor, hoping to do him proud – and get that perfect shot!

Here’s to you finding the perfect shot!  Keep your eyes peeled for the next shooting tip from the We Shoot Newsletter.  In the meantime, please respond with your questions, ideas, and topics you’d like us to address.  They are all most welcome.

– Dione Benson

4/4/18


Tags: angle of view, architectural photography, interiors, manufacturing, perfect shot, perspective, photographer, photography, product photography
Posted in How To, Information, Tips | Comments Off on It’s All About The Angle – 9/20/18

How To Recover An Unreadable Hard-Drive For Free (12/19/16)

Monday, December 19th, 2016

A few days ago, I was looking for some files that weren’t on my Win 7 Pro PC, but rather on a “retired” external USB hard-drive.  It was an old drive that had been taken out of service due to its age and the fact that it was almost full.  I attached the drive to electrical power and my computer, and the drive registered, but was unreadable.  A box popped up and asked if I wanted to format the drive.  I said no.  I knew that the files were still on that drive, but the computer couldn’t access them.   I tried a few things, but to no avail.  The company that manufactures the drive offers recovery software for $99.00 (not guaranteed), or will recover a drive if sent to them, starting at $499.00, up to $20,000.00.  There is no charge if they can’t recover anything.

Read all the text below before proceeding.

I didn’t think the files in question were worth anything near this expenditure, but other files on the drive may be.  Then I thought, “Find out what to do on YouTube!”  I found this 2-minute, 12-second video that saved me a lot of money at https://www.youtube.com/watch?v=Ix13LRGmzk8 .

The one thing the video author didn’t address is how to get the correct command prompt to attempt this repair.  I will add this:  To get the proper Command Prompt, either find the short-cut in your Start Button Menu (usually in “All Programs”> Accessories) , and right-click it.  Then click “Run As Administrator.”  The command prompt will then say “C:\Windows\System32.”  If you can’t find the Command Prompt shortcut, simply type “cmd” (without the quote marks) in the query line at the bottom of the start menu, and cmd.exe will show up above in the list.  Right-click cmd.exe and “Run As Administrator.”  Then follow the YouTube video.  I don’t know if it will work for you (and I guarantee nothing, but it worked for me), and there may be files lost due to what caused the unreadable disk in the first place.

But give it some time as it takes a while, and the bigger the drive, the longer it takes.  On my drive, the program found 6 bad sectors and overwrote them and the drive was readable in a few minutes, once Windows had indexed the drive.  I was able to find and use the files I was looking for.  I do not know if I lost anything valuable as there are quite a lot of files on this drive.

(Only do this repair if you are willing to assume all the risk.)

Gary Silverstein

-We Shoot

Tags: computer, computers, data, hard drive, harddrive, storage
Posted in How To, Information, Learning, Tips | Comments Off on How To Recover An Unreadable Hard-Drive For Free (12/19/16)

Everybody’s a food photographer . . . NOT!

Thursday, July 10th, 2014

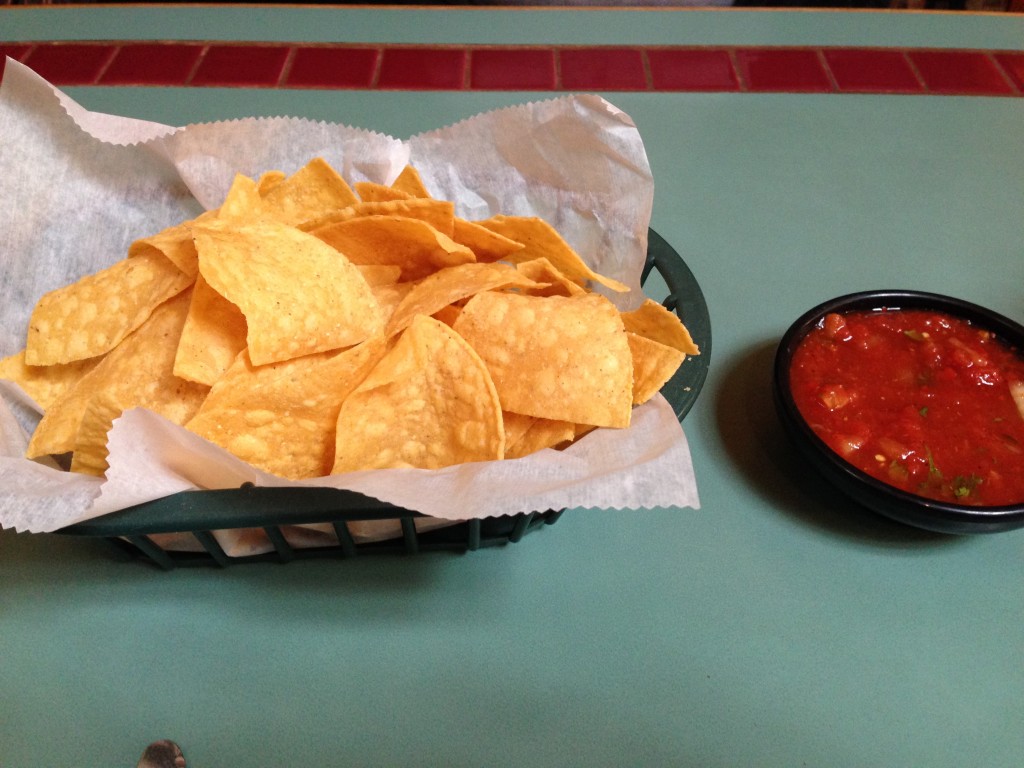
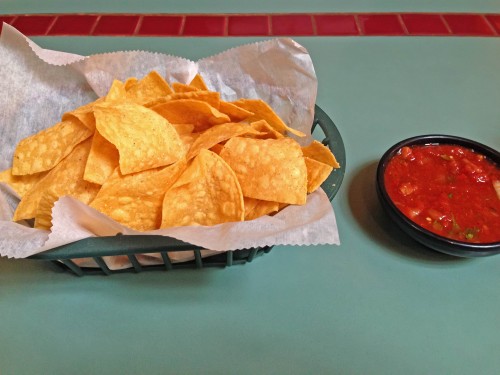
Like a lot of other people, I go to Facebook, Flickr, Twitter, and other social sites, and I see lots of images of food.  Contacts and colleagues, as well as anonymous strangers, have decided to show what they are about to eat, or have partially eaten.  The explosion of cell phone cameras and other low-cost digital cameras has allowed many people to think of themselves as “Food Photographers.” Anyone today with a heartbeat can take a picture.  I look at some of the food photography online, and there are comments from others on this, like:  “That looks so yummy, I wish I could have some!”  Or, “That looks delicious!”  I look at the images and it is all I can do to keep my last meal down.  What I usually see is not well composed, never styled, improperly lit, and the colors are sickly.  This is akin to those blurry, out of focus  images some people take of their kids and post on Facebook, to the delight of their friends and grandparents who say “Great shot!” The one thing they all have in common was that all the images were created for free, once you factor out the cost of the phone or camera, memory cards, readers, computers, and editing software. As I create food photography professionally, I have decided to see if I could take decent images of food with my cell phone and run it through Photoshop to get decent looking food shots. Now, real commercial food photography takes planning, a good food stylist, lots of lighting and equipment, and photographic experience.  It also takes a tremendous amount of patience.  I have dealt with clients, corporate chefs, tight spaces, and less than ideal shooting conditions.  Sometimes the food looks great but is actually inedible because things are done to it for the purpose of great photography. I went out to a favorite Mexican restaurant for dinner the other night and, as usual, I brought along my iPhone, which actually has a decent camera built-in (for what it is).  It takes 8 megapixel images in .jpg form.  It performs reasonably well in relatively low lighting conditions.  It has a strobe.  But, first, it doesn’t shoot in RAW format. This is important for making better final images.  More megapixels means more information and higher enlargement quality.  Not all megapixels are equal.  There are many cell phones that have larger pixel counts than the iPhone, but the picture quality isn’t as high, as evidenced by the fact that several stock agencies will accept still images and video from iPhones, but not other cell phones.  Image noise becomes a factor when jamming high pixel counts on small sensors. For this reason, a cell phone isn’t what a pro would use.  If you are going to shoot food, in my opinion, a 24mm X 16mm sensor in a DSLR at 10 megapixels that shoots in RAW format would be the minimum to use. So, despite my opinion, I decided to experiment as a pro since I have indeed been paid to photograph food by people in the food biz.  I decided to work with the chips and salsa. The first obstacle is lighting.  In this example, we are away from the outside windows and close to an inside wall. I am shooting hand-held.  So it has to be either the ambient room lighting or the camera flash.  Trying the flash, I get the following image: IMG_0388 Although it looks sharp as a small image, there is unacceptable camera movement evident in the full-sized version.  Harsh shadow at the top of the paper.  Loss of light away from the center, and all the color is off.  No styling is evident.  This was just the way the food was delivered.  Yet I see images on FB worse than this with someone saying “yummy” in the comments. I then try the somewhat same shot using room lighting, without the strobe.  See the sample image below: IMG_0384   While in-focus and more appealing color is evident and lighting is more even, the shadows are still way too heavy, caused by non-diffused room lighting.  The position of the camera is dictated by my seating.  I can’t get far enough back to get the chips and salsa in the frame.  The tip of my silverware can be seen at the bottom of the image.  Remember that I am shooting as most people do who post images online, not as a pro.  There will be no styling. Next, I take the image and put it through a little Photoshop massage.  It comes out looking like this: IMG_0384 ret With shadows lightened, color enhanced, top of the image straightened, and the silverware tip removed, it looks better – but still nowhere near professional quality.  Maybe worthy of FB, but not for marketing. I will show you a styled, professional image we did a while back of two taco salads, chips, and the rest of the fixings: taco salads As you can see, the color is quite appealing, the image is light and colorful, and the food is crisp and fresh-looking. Shadows are attractive and unobtrusive. The image has been styled by a professional stylist, and a lot of diffused strobe light has been used.  Lighting is off-camera to give highlights where needed and provide depth.  This is professional food photography – the kind supplied by We Shoot.
– Gary Silverstein

Tags: commercial, commercial photographer, commercial photography, food, food photography, Photoshop, retouch, shoot, shooting, weshoot.com
Posted in How To, Information, Learning, Tips | Comments Off on Everybody’s a food photographer . . . NOT!

Protecting Your iPad, Part 2 . . .

Friday, March 15th, 2013

It has come to my attention that some out there may not be adept at using Photoshop to make a lockout screen image for protecting their iPad in the event of theft or loss.  If you read over my last post, at http://weshoot.com/wordpress/?p=591, it relies on using a photo editing program (in this case, Photoshop) to make an attractive lockout screen wallpaper to help get an iPad recovered to its rightful owner.  Well, if you don’t have Photoshop or graphics capability, you can use the iPad itself to make an image that will help.

First, get a piece of paper and write something on it to help get the iPad back to you, like the image below:

Property of We Shoot

Now, get the iPad and capture an image of what was written on the paper using the Camera App.  This will automatically place the image in both the photostream and the camera roll.  Go into the Settings App.  Go to “Brightness and Wall Paper” and find the just-taken image for your lockout screen wallpaper.  Although it’s not as elegant-looking as the image in my previous post, it will be as effective in getting your iPad back, should it be stolen or lost.

– Gary Silverstein

We Shoot

Tags: computer, iPad, lock screen, lockout, loss, recover, screen, stolen, tablet, theft
Posted in How To, Learning, Tips | Comments Off on Protecting Your iPad, Part 2 . . .

Using Photoshop To Protect Your iPad!

Wednesday, February 20th, 2013

If you have a wifi only iPad you may think you are protected by the Apple “Find My iPad” utility, but you are not.  If you lose it, or it is stolen, how will it be recovered?  Remember, for the Find My iPad app to work, the iPad has to be signed into the Internet.  If you don’t set a password or passcode, it is possible for a thief to go into the settings and shut off Find My iPad.  If you do set a password or passcode, it is only possible for the iPad to go online if it is in a place where it has signed into the Internet before, without asking if it should.  Otherwise, it remains offline, and Find My iPad can’t find it.

This means that should the police or someone else recover your iPad, they can’t find out how to contact you to say they have it, because they, too, are locked out.

This is how Photoshop or another photo editing tool can help.  The iPad allows you to put an image on the lockout screen, other than the one it comes with.

Go into Photoshop and open a new document in the size of the resolution of your screen.  In the case of the iPad 4 it is 2048 pixels X 1536 pixels @ 264 pixels per inch.  Then add whatever colors you want or add an image as a layer.  Next, find the center and use the text tool using the center-justified tool, and put in some text that identifies this iPad as yours.  See the example below.

Property of We Shoot                       

Make something that works for you, and then flatten the image.  Save it as a jpeg.  I used a quality of 7. 

Upload it as an image through iCloud using your Photostream.  Go on your iPad and open Photostream.  Tap the image and when it gets smaller, tap “edit,” tap the image again so there is a checkmark on the thumbnail, tap “Save to Camera Roll.”  Go into the Camera Roll, tap “edit,” tap the thumbnail,  tap “share,” and then tap “use as wallpaper.”  Now choose “Set Lock Screen.”  Turn off your display.  Reopen.  Your new wallpaper should show the image you just put on your iPad.

Of course, you can do this with your 3G or 4G iPhones and iPads as well.

This way, if some thief steals your iPad and can’t break the passcode or password, anyone he or she shows it to knows it has been stolen.  If it is lost, someone who finds it will be able to get in touch with you, or if the police have it, they will be able to contact you.

While not perfect, it should help you hold onto your iPad or maybe get it back.

– Gary Silverstein

We Shoot

We Shoot is a commercial product, food, industrial, and architectural photography team based in the Seattle area.

Tags: apple, apple picking, image, iPad, iPhone, lock screen, lost, Photoshop, police, property, recover, recovery, stolen
Posted in How To, Tips | Comments Off on Using Photoshop To Protect Your iPad!

Bracketing with Studio Strobes . . .

Friday, February 15th, 2013

Product and other forms of commercial photography sometimes require the use of strobes.  Strobes usually provide daylight color balance which helps with architectural photography as it allows a burst of light to light up a room, and use a time exposure to get the (daylight) scene outside a window so it looks like we see it.  Otherwise, the sunlit exterior is blown out, or in some instances, it can look darker and drearier than the interior, if it is overcast outside.  In the case of product, studio strobes are the powerful cousins of your on-camera strobes, and offer many advantages over the smaller units.

First, studio strobes are usually way more powerful, as they use very large batteries, 110v inverters, or wall socket power.  Second, they are portable and don’t have to be mounted on the camera, and give a more pleasing look as they don’t “flat-light” the subject and can be made to mitigate heavy shadows.  They are designed to work with many different accessories from umbrellas to soft boxes.  They can use many different types of wireless triggers.  They can generate more than enough light to shoot at tight apertures, allowing for deep depth of field.  In product and architecture, I find that shooting with small apertures (f11 to f16) allows me to get everything sharp and in focus.  If it is sharp in my original image, I can always create a shallow depth of field look in photo-editing software.  However, the reverse is not true.  Really soft images cannot be brought back into sharp focus even with the best of software.

All of the studio strobes I have used work with totally manual settings.  I usually set my camera on a tripod at f11 to f16 at 1/100th of a second or slower.  The strobe light burst lasts for a very short time.  This eliminates most movement, but how do I bracket under those conditions, since I don’t want to change either the shutter speed or aperture once I start shooting?  The answer is in the manual controls of the studio strobes.  Once I get my best-looking exposure of all elements by shooting and rechecking the image, I plan on shooting a series of images bracketed on either side of that exposure by working the slides or dials on my equipment, usually in half-stop increments.  I may be using as many as 3 or 4 lights at different angles, and each will need to be adjusted individually for each exposure.  This gives me the same object at the same depth of field at the same shutter speed from a dark exposure to an overblown exposure.  Why would I want to do this?  I can then pick and choose the best exposed parts of the object or room and using an editing program, such as Adobe Photoshop, I assemble them to make a perfectly exposed object with detail where it needs to be without any noise.  I can also make an HDR image from all the exposures, if that gets me a better-looking image.

Being a commercial photographer means getting the best satisfactory image for your client.  A commercial photographer having the right equipment and expertise means leaving very little to chance.

– Gary Silverstein

We Shoot

We Shoot is a commercial product, food, industrial, and architectural photography team based in the Seattle area.

Tags: architectural, bracketing, commercial, edit, flash, flat-light, flat-lit, food, hdr, industrial, lighting, off-camera, on-camera, photography, Photoshop, product, shadow, software, strobes, studio strobes
Posted in How To, Learning, Tips | Comments Off on Bracketing with Studio Strobes . . .

Bracketing With Hot Lights And Available Light . . .

Wednesday, January 16th, 2013

In my last post, I discussed bracketing of exposures.  Today, let’s talk about bracketing with hot lights.  Hot lights are a continuous lighting source and should be regarded as available light, just sometimes very intense, and very bright.  A majority of hot lights are of incandescent color temperature, adding a warm or yellow tone to your image.  In most modern DSLRs, there is a setting for tungsten or incandescent light which compensates for the warm tint by adding a blue or cyan tint to the image.

Instead of using the incandescent mode in the camera for white balance, I prefer taking one exposure with a gray card in the image and setting the gray reading for all the images I take in that series with my editing software.  Outdoors, my cameras are very accurate, so the automatic white balance setting works just fine.  Indoors with a mix of lighting, a gray card or an Expodisk is the ticket.

Now, back to bracketing with available light and hot lights.  My cameras will do up to nine bracketed shots (different exposures of the same image) automatically.  Some cameras only allow three images for auto bracketing.  If you desire more exposures for either HDR (High Dynamic Range) images or for layering the images with these cameras, the way to facilitate that is to do it manually.  As in my last article, adjust the exposure by putting the camera in aperture-priority mode, setting one aperture and changing the shutter speed to bracket various exposures.  My choice is to use 2/3 of a stop difference for each of my brackets.  You may like 1/3 stop, 1/2 stop, 1 stop, or ? bracketing stops instead.  If doing this manually, try to get one optimum exposure, i.e. the one picked by the camera as the overall best exposure, and make the same number of exposures brighter and darker on either side of the optimum exposure.  Also, if doing it manually, you will have to put the camera on full manual for exposure, then set your aperture where you want and vary the time for the brackets.

The reason for bracketing is that the latitude for digital images is about 5 stops with detail and no digital “noise.”  When lightening darker areas in a digital image, one sometimes runs into noise, either color noise which looks likes flecks of red, green, and/or yellow in that area, or luma noise, which looks like flecks of black snow.  Noise is usually unacceptable in commercial work and for stock images.  The answer is to bracket and take images in which even shadow areas are light enough to have detail without the need to lighten them, and to blend them into the finished image, either with HDR or layering and masking in computer-editing software.  Conversely, blown-out areas of one image can be recovered from a darker bracketed image, and give detail to blown-out areas.

In summary, bracketing with available lighting or with hot lights is basically the same, and white balance should be checked and adjusted should the need arise.

-Gary Silverstein


Tags: bracket, bracketing, brackets, commercial photography, editing, exposure, exposures, hdr, hot lights, image, layer, layering, lights, photography, Photoshop, professional, software, We Shoot Photography, weshoot.com
Posted in How To, Learning, Tips | Comments Off on Bracketing With Hot Lights And Available Light . . .

<< Previous

  • Categories

    • How To (20)
    • Information (546)
    • Learning (30)
    • Lighting (179)
    • Marketing (290)
    • Photographs, Images (543)
    • Tips (38)
    • Uncategorized (2)
    • video (13)
  • Archives

    • May 2025
    • April 2025
    • January 2025
    • December 2024
    • November 2024
    • September 2024
    • August 2024
    • July 2024
    • June 2024
    • May 2024
    • April 2024
    • March 2024
    • February 2024
    • December 2023
    • November 2023
    • October 2023
    • September 2023
    • August 2023
    • July 2023
    • May 2023
    • February 2023
    • January 2023
    • October 2022
    • September 2022
    • August 2022
    • July 2022
    • March 2022
    • February 2022
    • January 2022
    • December 2021
    • July 2021
    • June 2021
    • May 2021
    • April 2021
    • March 2021
    • February 2021
    • January 2021
    • December 2020
    • November 2020
    • October 2020
    • September 2020
    • August 2020
    • July 2020
    • June 2020
    • May 2020
    • April 2020
    • March 2020
    • February 2020
    • January 2020
    • December 2019
    • November 2019
    • October 2019
    • September 2019
    • August 2019
    • July 2019
    • June 2019
    • May 2019
    • April 2019
    • March 2019
    • February 2019
    • January 2019
    • December 2018
    • November 2018
    • October 2018
    • September 2018
    • August 2018
    • July 2018
    • June 2018
    • May 2018
    • April 2018
    • March 2018
    • February 2018
    • January 2018
    • December 2017
    • November 2017
    • October 2017
    • September 2017
    • August 2017
    • July 2017
    • June 2017
    • May 2017
    • April 2017
    • March 2017
    • February 2017
    • January 2017
    • December 2016
    • November 2016
    • October 2016
    • September 2016
    • August 2016
    • July 2016
    • June 2016
    • May 2016
    • April 2016
    • March 2016
    • February 2016
    • January 2016
    • December 2015
    • November 2015
    • October 2015
    • September 2015
    • August 2015
    • July 2015
    • June 2015
    • May 2015
    • July 2014
    • June 2014
    • May 2014
    • September 2013
    • June 2013
    • March 2013
    • February 2013
    • January 2013
    • December 2012
    • October 2012
    • July 2012
    • June 2012
    • May 2012
    • March 2012
    • February 2012
    • December 2011
    • September 2011
    • August 2011
    • July 2011
    • March 2011
    • December 2010
    • October 2010
    • September 2010
    • July 2010
    • June 2010
  • Meta

    • Log in
    • Entries RSS
    • Comments RSS
    • WordPress.org

Copyright © 2025 - weshoot.com | Entries (RSS) | Comments (RSS)

WordPress theme designed by web design