How to take more professional images . . .
Tuesday, August 9th, 2011
We just finished a product shoot where the client first tried to take the pictures himself. That did not give him the results he wanted for his business promotion. He called a friend with “A really good camera,” and the results were, shall we say, less than stellar. He called us and showed us the images his friend had taken. While he indeed may have had a really good camera, his friend lacked the skills and equipment necessary to show the products in the absolute best light (pun intended). For most product photography, it is all about the lighting and knowing how to use it. It is not about the camera, lens, or resolution (sufficiency in each is all that is needed). Quality of lighting – diffused or harsh, color of lighting, and its relationship to white balance are all factors. Lighting shape is a factor – square, round, or some other shape. How will the light reflect off the subject? Using an umbrella to spread out the light when shooting a mirrored surface will show the ribbing in the umbrella in reflection. Is a spotlight required? How is that accomplished? When should one use continuous lighting (such as hot lights), or should one use strobes? What are the advantages of each?
When we were done and presented the final images to our client, he said that he felt bad that he wasn’t using his friend’s images. But then he said this was about making money from his business and increasing same, and although he didn’t want to make his friend unhappy, he wanted to use these images to make money. And that is the bottom line. I am including some images as samples. They have nothing to do with the above-mentioned product shoot, but are being used for illustrative purposes only.
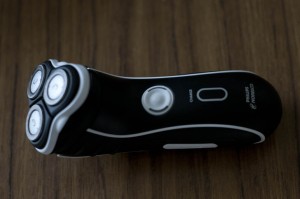
Sample 1 is an image I took to illustrate really poor photography. I used the flash built into a pro-sumer DSLR and the image is badly out of focus (on purpose). It is underexposed. It is taken against a dark busy background, and there is no editing whatsoever of the image. I have seen shots like this on eBay, and even company websites when someone is trying to promote their products – anything from a widget to a building. Except for the fact that the image cost nothing to create (once the camera has been purchased), there is nothing good to say about it. In fact, bad photography could be hiding flaws in the product, as far as the viewer knows. If the photography is bad, whatever the company is selling is suspect – if corners are cut with the photos, what corners were cut with the product? For a better chance at selling an item with a photograph, a bit of work will be involved.
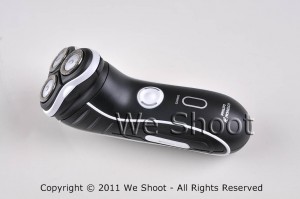
Sample 2 is against a white fomecore background and had two AC-powered studio strobes with soft boxes opposite each other at each end of the shaver to show texture in the shaver, and to highlight stainless steel cutting heads. The soft boxes spread light out with very diffused lighting and bring out a lot of detail with no harsh shadows. There is some minor enhancement with Photoshop in this sample.
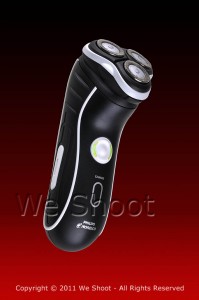
In sample 3, I have made a “clipping path” to trace out the shaver from the original background, rotated the image vertically, and made a background layer with Photoshop in which I made a gradient of black and red. Some more enhancement was done with Photoshop, including making the glowing yellow-green lights on either side of the on-off switch to simulate the look when the shaver is switched on. Now you may ask why I didn’t take it with the shaver “on,” instead of simulating the look. First, the shaver probably wouldn’t stay in position with the vibration of the shaver running, and also because I had more control of how it looks in the output this way.
Now, which sample image would you choose to promote your product?
I will help you get close to sample 2 results, but you have to have some other props and accessories and do extra work to get there. First get something white (for a dark subject) as a background , like a piece of fomecore. It also helps reflect white light onto a dark object. If shooting a light-colored or white object, you might want to go with gray or black as a background to contrast. Next, go to a store like Lowe’s or Home Depot and buy several clamp light housings (see http://bit.ly/o3p5cP ) and a commensurate number of daylight compact fluorescent bulbs. This won’t work as well as strobes with soft-boxes, but it will beat using a camera-mounted strobe. Try different lighting positions until you get the lighting, shadows, and highlights you desire. You will also need a tripod and a camera capable of taking a time exposure and allowing the flash to be deactivated. You may also need to set the white balance (check your camera or editing program documentation to see how to do that ). Make sure to get sharp focus. Getting too close to the subject reduces depth-of-field, and some part of the subject will go out of focus. Take several shots at different exposures to get the best one. It may take more tries to get exactly what you want.
To get to sample 3 results, you will need a photo-editing program, and know enough on how to work with images for given results. That is not within the scope of this article. Really good product image editing takes knowledge, experience, and patience. It can be time consuming and a lot of hard work. It also helps to know a few enhancement secrets and have a lot of Photoshop experience. That’s why I still get work, even if my client has a “really good camera.”
– Gary Silverstein


