The Difference A Background Can Make . . .
Monday, October 1st, 2012
In the days of film, a professional commercial photographer had to be very careful of the backgrounds that would be used in his/her images. Retouching was expensive. Shooting an item for use against another background from the one it was taken with could be a labor-intensive multi-step process. A spot on a high-key (pure white) background could be touched out on the negative, and a nightmare undertaking on a transparency. Today, of course, images are taken digitally and manipulated by editing programs, like Photoshop. One of our most recent shoots involved large, heavy industrial products. In film-days past, we would have probably used a seamless white background to shoot the product and spent a lot of time with product placement. The items to be photographed were round, between two and three feet in diameter, and each weighed 500 or more pounds. Five views were to be taken of each. That means that either the item would have to be moved on the background, or very carefully lifted by a hoist onto the background. We would have to be careful of marks left by the items where they rested on the paper, and some method of keeping such round items from rolling off the surface would have to be employed and kept out of sight.
So, pre-planning for the shoot is still important, even in this digital world. We opted to not use any type of manufactured background per se, but to only use white reflectors in strategic places to reflect light or add a highlight where we desired. Not using a background simplified the lighting somewhat in that a roll of paper or fabric didn’t block out the light from behind each item. We were going to photograph the items in the factory environment with the idea that we would isolate the image in Photoshop, and put it on another, more desirable background.
Lighting was done with our powerful studio strobes, and the modeling lights on the strobes gave us an idea of how the lighting would look in the finished image. We shot with soft-boxes to give a square look to our lighting in the highlights, as umbrellas just wouldn’t cut it here as these products were light-reflective. We planned to keep the camera stationary, move the lights as necessary, and rotate the product for the five different angles the customer required. Since the objects were circular, and we wanted to keep all the images the same size, we had to plan how to keep that proportionality. Think of a coin stood on edge. The widest the image would have to be is a little more than the diameter when one of the faces of the coin is toward you. When the edge of the coin is nearer to you, the size of the image could change, but we wanted to make them all the same size for the client’s ease of putting together several views of their product. Also, we had to be far enough away to assure depth of field when we were shooting the views that showed part of the object furthest away. Editing programs have great sharpening utilities, but a severely out-of-focus image cannot be brought back. You can easily blur parts of a sharp image and make it look good if needed for the effect, but the reverse isn’t the case. So all this had to be figured out in advance.
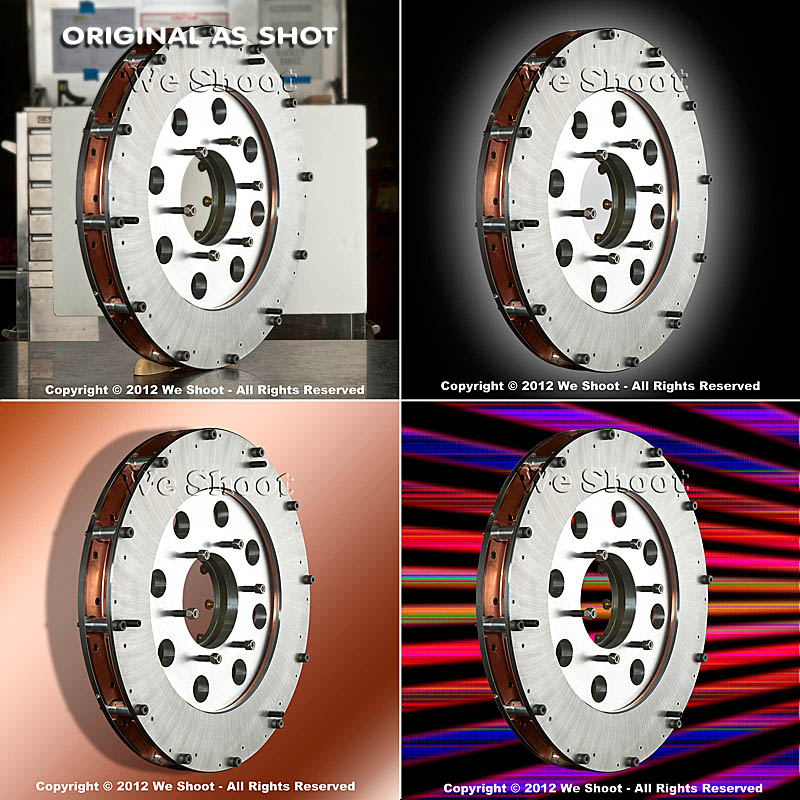
Now, let’s go on to the backgrounds for the images. Since the area or table on which the items were shot was in a fixed location, the background for each image (as produced by the camera) would have been a toolbox and other parts of the assembly plant. So we made it so that we and our client could “lift” the item off the background and put it on any other background or even a video. This is done by means of a “clipping path.” This is a very labor-intensive process. It means that I use a Photoshop tool to painstakingly trace out every edge of the product at anywhere from a 100% to a 300% enlargement. Once I have outlined every hole, edge, and cranny, I “select” the item alone and make a layer of it to put on other backgrounds. I include this clipping path with the image, so the client is able to do the same. Now, you may ask why I do so much work, as some of the editing programs have become pretty sophisticated and make an easier selection with other, faster tools. Well, the answer is this: I have used these editing tools, and sometimes there are errors in the program choosing what is part of the item and what is not. It may not be noticeable on a small jpeg on a website, but it will stick out like a sore thumb on a 30X40 enlargement at a trade show. That is what separates a pro from an amateur. Below are an original view of one of the products, and a few different backgrounds that I feel work well. Each background below was created in Photoshop, but other backgrounds could be used, as well. Remember that whichever one a client chooses, I include the clipping path so they can put it against another background if that is their need.

As you can see, the product image looks at home with any of the backgrounds. Keep this in mind as you plan your next shoot.
– Gary Silverstein


