Weshoot.com

The Official We Shoot Blog

  • Home
  • About
  • To Comment

Posts Tagged ‘view’

We Shoot Photography Of The Day For 1/28/2018

Monday, January 29th, 2018

Click on image to enlarge.  Click again to enlarge to full size. 

Click on back button to return to post.

Click the “Home” tab above to see earlier posts.

Seattle Commercial Photography by We Shoot


Seattle Commercial Photography by We Shoot.

4″ X 5″ Large Format Camera And Accessories.  Seattle Commercial Photography by We Shoot.

There was a time when we used this camera to shoot commercial work here at We Shoot.  There was nothing automatic, the media was 4″ X  5″ transparencies and negatives, and the image viewed at the back of the camera was upside down and backward.  The image quality from equipment like this was very high.  The workflow and equipment has changed, but high quality is still our standard.

Tags: 4x5, bag, bellows, camera, film, holder, holders, large format, lens, manual, perspective control, rail, view
Posted in Information, Lighting, Marketing, Photographs, Images | Comments Off on We Shoot Photography Of The Day For 1/28/2018

We Shoot Photography Of The Day For 12/21/2015

Monday, December 21st, 2015

Click on image to enlarge. 

Click on back button to return to post.

Click the “Home” tab above to see earlier posts.

Seattle Commercial Photography

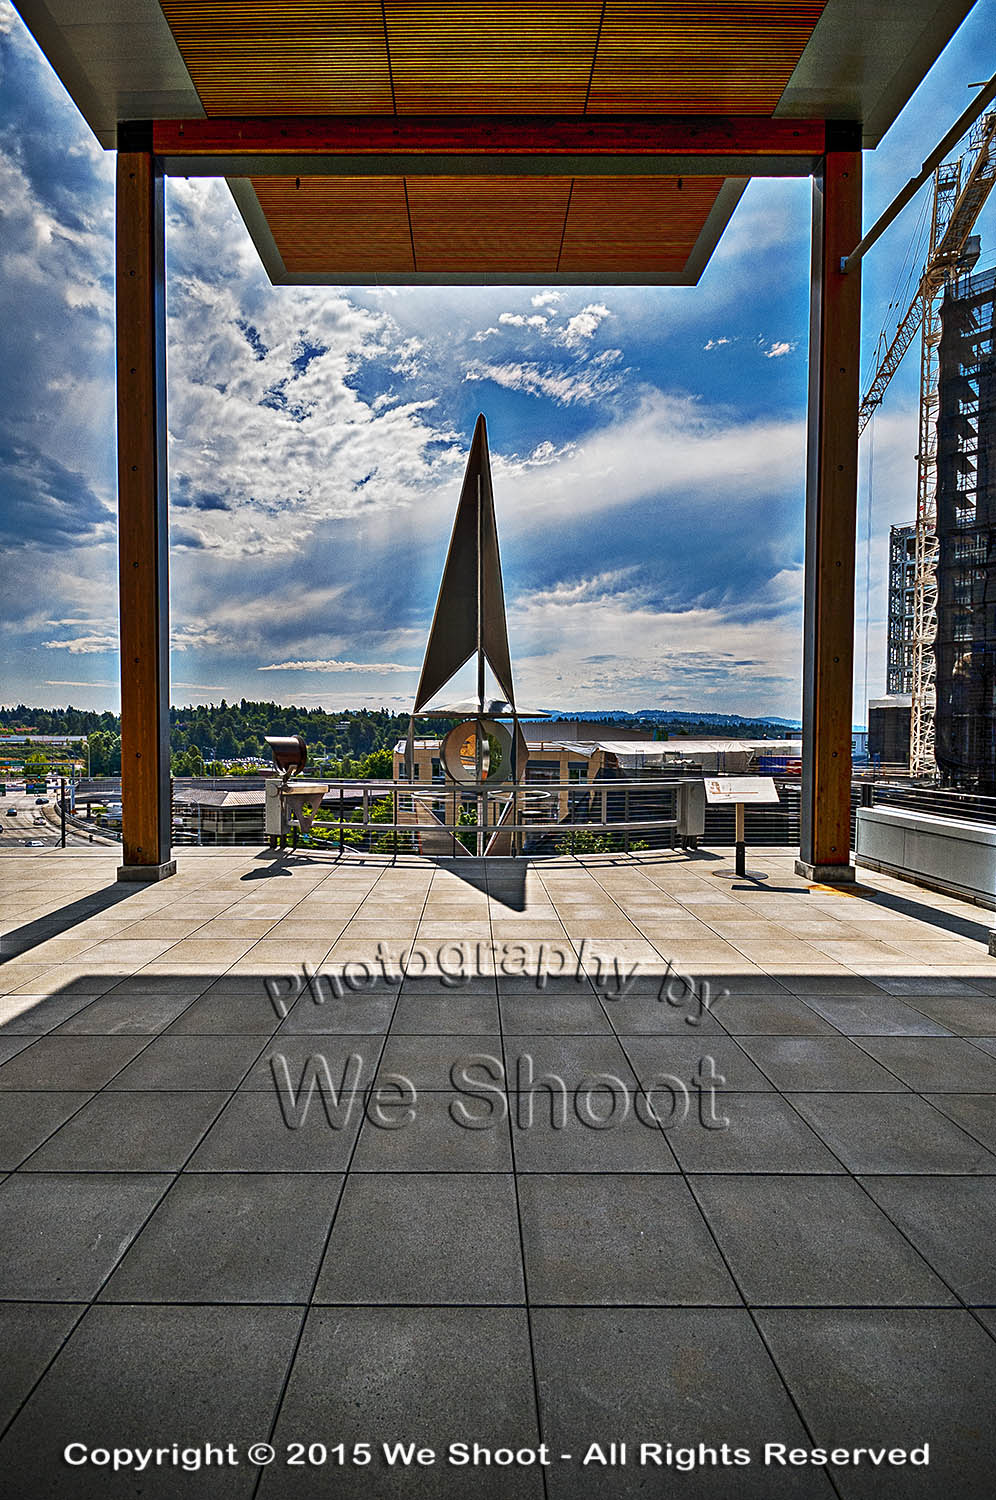
The view of Bellvue from the City Hall. Seattle Commercial Photography by We Shoot.

Seattle Commercial Photography by We Shoot

Tags: Bellevue, blue, City Hall, cloud, clouds, cloudy, deck, observation, outdoor, outdoors, Seattle, sky, view
Posted in Information, Photographs, Images | Comments Off on We Shoot Photography Of The Day For 12/21/2015

We Shoot Photography Of The Day For 7/22/2015

Wednesday, July 22nd, 2015

Click on image to enlarge. 

Click on back button to return to post.

Click the “Home” tab above to see earlier posts.

Seattle Commercial Photographer

An aerial view of the Port of Olympia, Washington by Seattle commercial photographer We Shoot.  The State Capitol Building is in the background.

Seattle Commercial Photography by We Shoot

Tags: aerial, boat, boats, cargo, commerce, commercial, freighter, freighters, Olympia, port, seaport, ship, ships, view
Posted in Information, Marketing, Photographs, Images | Comments Off on We Shoot Photography Of The Day For 7/22/2015

We Shoot Photography Of The Day For 7/20/2015

Monday, July 20th, 2015

Click on image to enlarge. 

Click on back button to return to post.

Click the “Home” tab above to see earlier posts.

Seattle Commercial Photographer

Aerial view of the Port of Olympia by Seattle Commercial Photographer We Shoot.

Seattle Commercial Photography by We Shoot

Tags: aerial, commerce, commercial, Olympia, port, Port Of Olympia, Puget Sound, sea, ship, ships, sound, view, Washington
Posted in Information, Marketing, Photographs, Images | Comments Off on We Shoot Photography Of The Day For 7/20/2015

Reflecting on Reflections, Part 2

Thursday, June 24th, 2010

Without a doubt, the hardest single thing I ever photographed was, of all things, something so ubiquitous that we handle them every day.  I am talking about door knobs.  Plain, highly reflective, brass doorknobs.  Now, why is it so hard to photograph a doorknob?  Well, it becomes a lot more difficult when there are some rules.  Rules like one would run into with a doorknob manufacturer looking for someone to shoot images of their products for promotions.  Do you think they want a reflected image of a happy, smiling distorted photographer looking out from their new brochure at the viewer?  How about seeing that photographer’s camera and tripod, or the space the doorknob happens to be in?  Simple, inexpensive, plain, highly polished brass doorknobs become painful to contemplate as a product photographer.  They not only are spherical and reflect the entire world around them, they have a backing plate made of the same stuff, that will reflect things that exist behind the knob, from the reflection on the back of the knob.  

Several years ago, we had spoken with a potential client, the marketing department head at a large manufacturer of doorknobs, hardware, and faucets about working for her company.  She said she had several photographers she used for shooting these products, but she said she would send us a sample of their products so that we could submit a test photograph to show that we could handle this type of photography, in case she needed our services.  Parameters for shooting this product were clear.  Shoot it on a 4″X 5″ transparency, and no retouching of any kind was permitted.  She said they did any retouching needed at the graphics department at the manufacturer.  

About 5 days later, the product arrived by UPS.  There was a plain brown cardboard box inside the outer package.  I opened it up and beheld a photographic nightmare.  It was an inexpensive, highly-polished brass doorknob set, complete with keys.  

It reflected everything!  It saw me, the room, everything in the room, and to my horror, the backing plate re-reflected everything the back of the knob “saw.”  I knew this was to be a fight.  I looked at images of doorknobs in advertising.  They looked perfect.  Some were “brushed” metal – not polished, but still shiny.  Some were dull finished, and just reflected highlights.  The polished ones stood out.  No reflections of photographers, cameras, tripods, rooms, etc.  I assumed that there was some reflection of a camera lens somewhere during the taking of the image, as there was no way to avoid the reflection from the angle presented.  A different angle may have allowed one to position the lens where the reflection would be positioned over the keyhole, but you can’t shoot there for different angles.  The first problem includes camera, tripod and photographer reflections.  One way to avoid this taking up a lot of room on the doorknob is to make a blind out of white material, like foam core, and cut a hole through which the camera lens “sees” the doorknob.  

Although this cuts down on untoward reflections, it still reflects the lens and the hole, unless the hole is dark and tight around the lens.  I figured this made for a minimum of retouching at the graphics department, and would be acceptable.  A second consideration was the lighting.  Lights or hot spots show up on the product itself and a smooth highlight with no hot spots would be a better solution.  Everything I tried did not work!  As said before, putting a piece of foam core in front of the doorknob cut down reflections, but I thought that aiming lights from behind the doorknob and bouncing the light toward the white foam core blind would produce the effect without bad reflections.  I was wrong.  The strobe “soft boxes” reflected into the back side of the door knob and re-reflected off the backing plate.  I had distorted oblong light reflections staring at me from the backing plate.  

It became evident there must be a way to do this.  I tried white sheets, but the lights created hot spots, and it reflected any corners and folds.  I had seen a shooting tent at my local pro camera store, and headed down there next.  A tent like this was used to evenly light small products and I thought this was the ticket.  It cost $250.00 plus tax.  I got the tent home, and assembled it.  It was made of a translucent white fabric, meant to diffuse the light inside.  It also was rigid and had seams and a rigid frame inside the fabric which showed up in the reflections.  It had several holes for camera placement, and try as I might with stuff to cover them, they showed up, too.  Fortunately, I was able to return the tent for a refund as it really didn’t do the job.  

I even talked to man who owned a company that made plastic blister packs in Santa Barbara.  I drove out to Santa Barbara to get a prototype dome of a transparent, but clouded plastic that he was thinking of producing.  It took out most of the distracting reflections, but reflected the cloudy nature of the dome and made the doorknob appear dull and not highly reflective.  I sent it back to Santa Barbara with a thank you note and a description of the effect.  

I finally built a box enclosure of translucent white plastic, got what I thought was a good image and sent that to the marketing manager.  She said to keep the doorknob, and she would call us if she needed us.  Last I heard, she was working for another company doing something completely different.  She never called!   

Below is the image I created, after scanning it and retouching it for our portfolio.  Shiny, reflective doorknobs are tough.  Try it if you doubt me.  

– Gary Silverstein      

Doorknob with minimal reflections - click on image to enlarge

Tags: 4x5, camera, photography, Photoshop, reflecting, reflections, retouch, shoot, shooting, view, view camera
Posted in Learning | 10 Comments »

Getting the mountain to come out!

Thursday, June 17th, 2010

I work and live in the great Pacific Northwest.  The area from Seattle through Tacoma and Olympia, Washington to Portland, Oregon is generally where you will find me.  The features that stand out around here are views with a mountain in them.  Whether it is Mt. Rainier, Mt. Saint Helens, Mt. Adams, Mt. Baker, or another of those monoliths that dominate the scenery, sometimes they are far enough away to get aerial haze clouding the images.  Consequently, if the image is light enough for great detail in the foreground of the image, the mountain will appear so light as to almost disappear from the image.  Here are some ways to fix this: all involve the use of editing software of some kind, but the results can be worth it.  See the two samples below.


There are many ways to get this to come out in one image.  If you are using raw software, you can make two different tiff images from the same raw file.  Manipulate one tiff so that the foreground comes out with the proper density and color, and edit the other version to be much darker, with more contrast and saturation.  Name them differently so you can bring them both up in your editing software.  Copy the lighter image to the darker one as a layer.  You can use the following editing program operations to edit the image.

I prefer the following method over the one outlined above, mainly because it allows retouching of the image as one image, rather than dealing with layering two different unretouched images.  First, open your image in your editing program – the one I currently use is Adobe Photoshop CS4.  Next, retouch and enhance the image as necessary.  Next, make a duplicate layer.  Save the newly-layered file as a separate psd file.  Click the eyeball symbol next to the upper layer to make it invisible, and move to the lower layer to work on it.  There are several ways to darken the bottom layer.  I prefer using adjustment layers like curves, levels, saturation, etc., to get this done.  Once the mountain looks sufficiently dense enough to appear stronger in the image, I click on the eyeball spot again to again make the upper layer visible.  I then create a mask for the upper image.  I sometimes take the pen tool and trace out the mountain to select it by itself, making a path that will become a selection, but in any event, I use a black brush to paint out part of the upper layer and allow the lower layer to show through to some degree, or even 100%.  If I think it needs more tweaking, I sometimes make a “soft light” layer above all the rest of the layers and darken appropriate areas.  Once I am satisfied, I flatten the layers and resave it in a “retouched” folder with the same number.  As you can see by the images above, it makes the mountain stand out, and it looks better than what the camera recorded to begin with.

– Gary Silverstein

Tags: enhance, enhancement, haze, mountain, pacific northwest, retouch, view, Washington
Posted in Tips | Comments Off on Getting the mountain to come out!

  • Categories

    • How To (21)
    • Information (548)
    • Learning (30)
    • Lighting (179)
    • Marketing (291)
    • Photographs, Images (545)
    • Tips (38)
    • Uncategorized (2)
    • video (13)
  • Archives

    • September 2025
    • June 2025
    • May 2025
    • April 2025
    • January 2025
    • December 2024
    • November 2024
    • September 2024
    • August 2024
    • July 2024
    • June 2024
    • May 2024
    • April 2024
    • March 2024
    • February 2024
    • December 2023
    • November 2023
    • October 2023
    • September 2023
    • August 2023
    • July 2023
    • May 2023
    • February 2023
    • January 2023
    • October 2022
    • September 2022
    • August 2022
    • July 2022
    • March 2022
    • February 2022
    • January 2022
    • December 2021
    • July 2021
    • June 2021
    • May 2021
    • April 2021
    • March 2021
    • February 2021
    • January 2021
    • December 2020
    • November 2020
    • October 2020
    • September 2020
    • August 2020
    • July 2020
    • June 2020
    • May 2020
    • April 2020
    • March 2020
    • February 2020
    • January 2020
    • December 2019
    • November 2019
    • October 2019
    • September 2019
    • August 2019
    • July 2019
    • June 2019
    • May 2019
    • April 2019
    • March 2019
    • February 2019
    • January 2019
    • December 2018
    • November 2018
    • October 2018
    • September 2018
    • August 2018
    • July 2018
    • June 2018
    • May 2018
    • April 2018
    • March 2018
    • February 2018
    • January 2018
    • December 2017
    • November 2017
    • October 2017
    • September 2017
    • August 2017
    • July 2017
    • June 2017
    • May 2017
    • April 2017
    • March 2017
    • February 2017
    • January 2017
    • December 2016
    • November 2016
    • October 2016
    • September 2016
    • August 2016
    • July 2016
    • June 2016
    • May 2016
    • April 2016
    • March 2016
    • February 2016
    • January 2016
    • December 2015
    • November 2015
    • October 2015
    • September 2015
    • August 2015
    • July 2015
    • June 2015
    • May 2015
    • July 2014
    • June 2014
    • May 2014
    • September 2013
    • June 2013
    • March 2013
    • February 2013
    • January 2013
    • December 2012
    • October 2012
    • July 2012
    • June 2012
    • May 2012
    • March 2012
    • February 2012
    • December 2011
    • September 2011
    • August 2011
    • July 2011
    • March 2011
    • December 2010
    • October 2010
    • September 2010
    • July 2010
    • June 2010
  • Meta

    • Log in
    • Entries RSS
    • Comments RSS
    • WordPress.org

Copyright © 2025 - weshoot.com | Entries (RSS) | Comments (RSS)

WordPress theme designed by web design